Tars Labs Experiment #1 : Creating a Telegram Bot to receive Tars chat submissions

DISCLAIMER: People who do not know how to code. Do not get intimidated, this tutorial might look technical but it is not. It’s just a bunch of copy-paste.
Telegram is the best messaging app you can download today. Their apps on Android and Windows are better than those of Messenger and WhatsApp and most importantly for me, their bot platform is the most open that I have found.
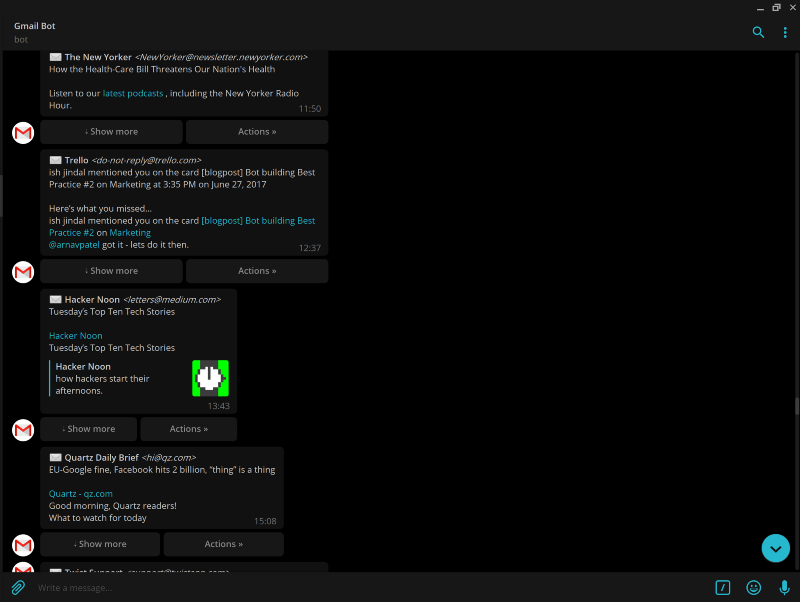
In fact, I like the service so much that I even started using Telegram as my primary Gmail client:
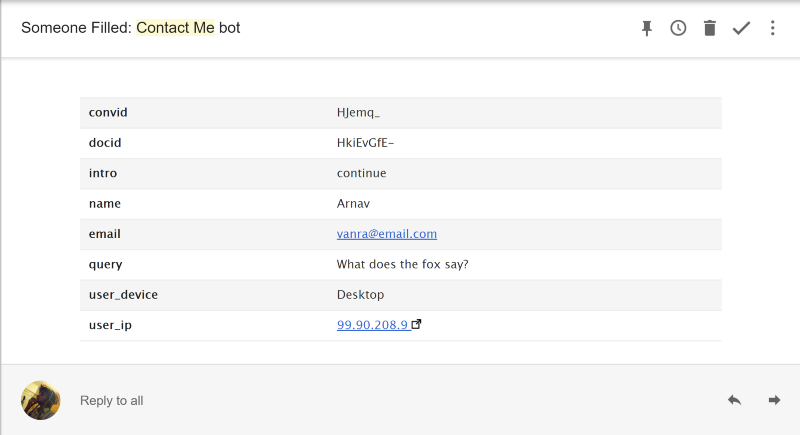
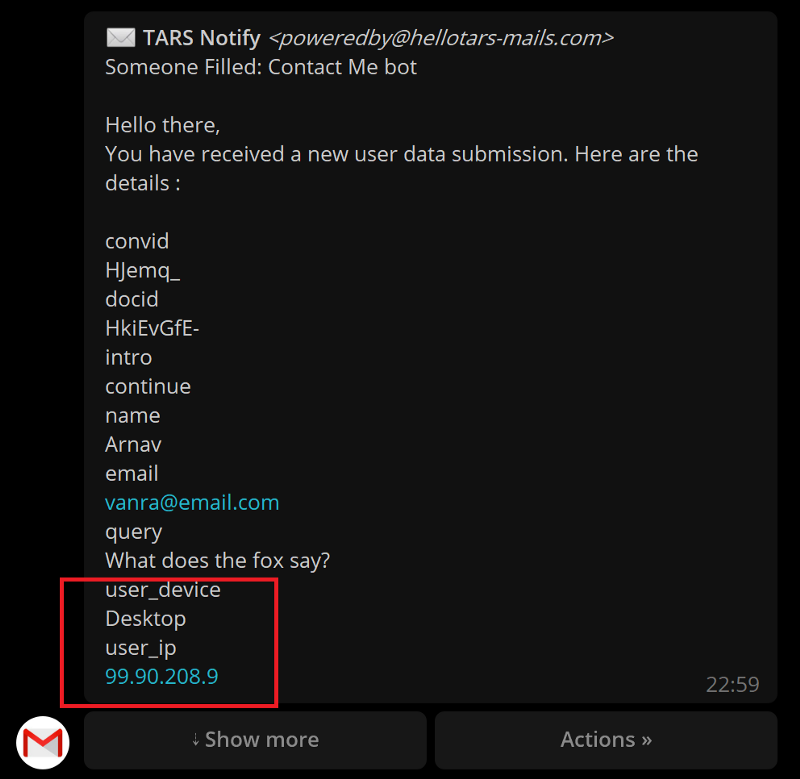
As a bot builder at TARS, this provided me with significant value. When someone completed one of my bots, I would get an email summarising their interaction that looks like this:
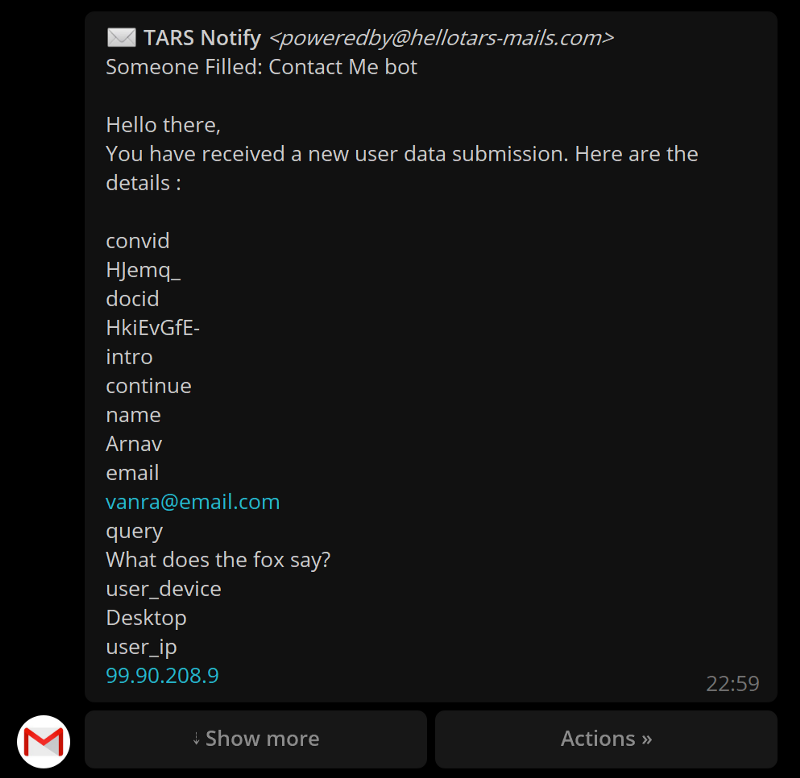
Linking my Telegram to my email, I instead got a telegram message describing the same:
Why was this advantageous?
I prefer the way Telegram handles notifications, especially on desktops, and getting the submissions as messages instead of emails was like having a live stream of notifications telling me when people fill out my bot.
Issues
Of course this method of viewing submissions was not perfect, the email formatting was not optimised for telegram messages, my submissions would get lost in the sea of newsletters and promotional emails and most annoyingly, the email gave me the whole chat summary with just the fields of the chat that I wanted :
Solution
To fix these issues, this past weekend I used the Telegram bot API to create my own personal TARS results bot that receives submissions from the bots I create in TARS.
Below are the steps you can follow to do the same:
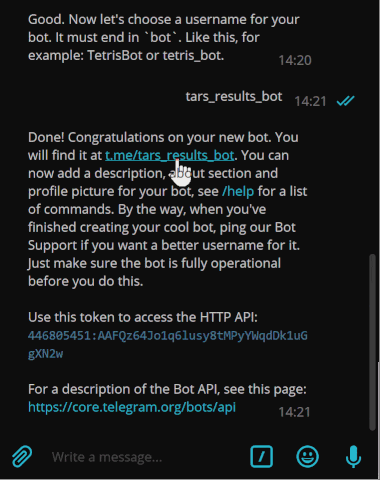
Create a bot on Telegram
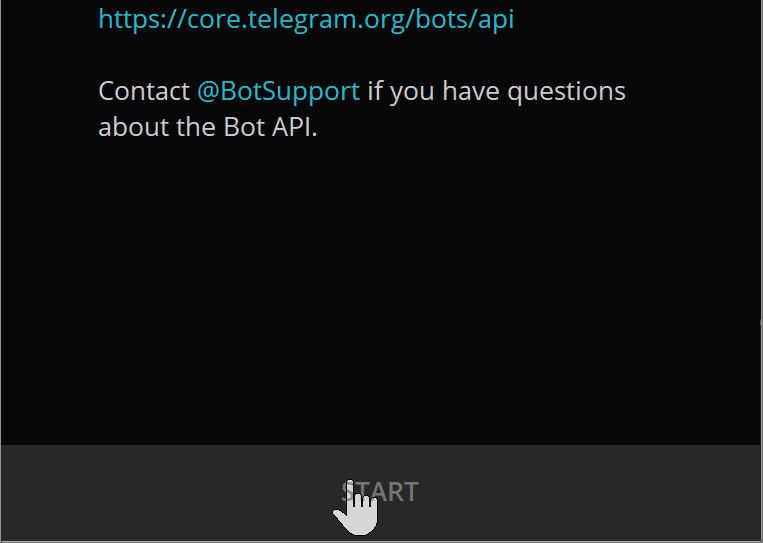
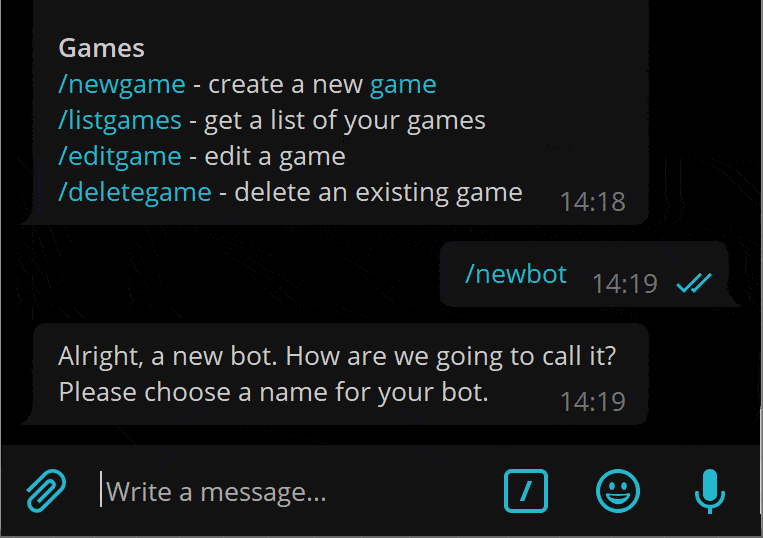
Go to Telegram Botfather (here is the link: https://telegram.me/BotFather) and create a new bot using the /newbot function
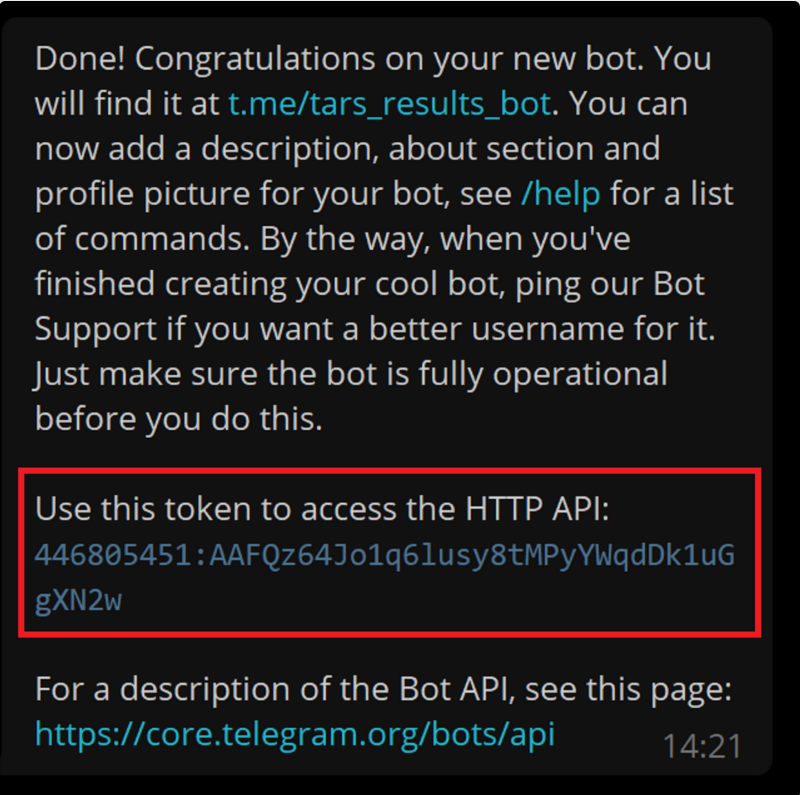
Follow the prompts that Botfather sends to you till he gives you an HTTP Token:
Take note of the HTTP API token. This is important:
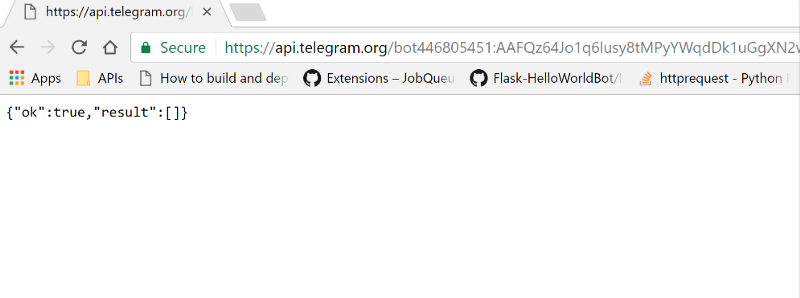
Find out your chat id on Telegram
Now open up a web browser and type this link in the address bar, replacing {BOT_TOKEN} with your HTTP API Token found in the previous step
https://api.telegram.org/bot{BOT_TOKEN}/getUpdates
The webpage should look like this:
Open up the bot and say hi:
Now refresh the webpage you opened above. You should see something that looks like this:
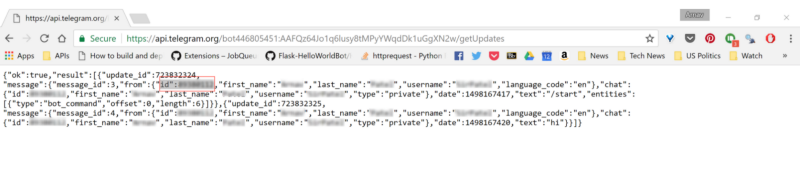
Take note of the id (highlighted and circled above). This is called your chat id AND IS VERY IMPORTANT
Set up the TARS Bot
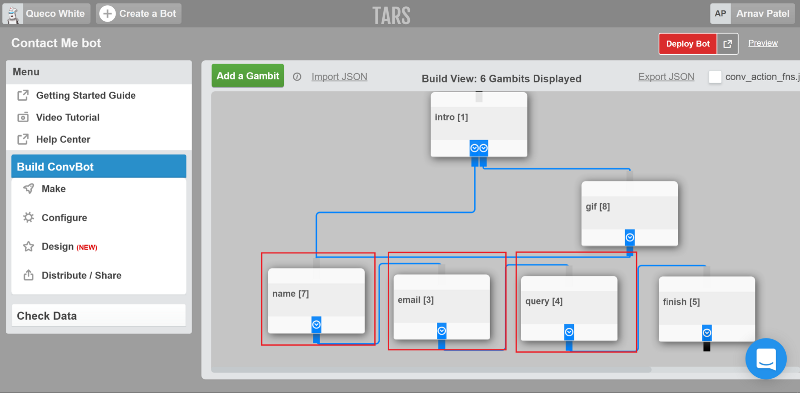
Open up the bot whose data you want submitted on telegram in the TARS builder.

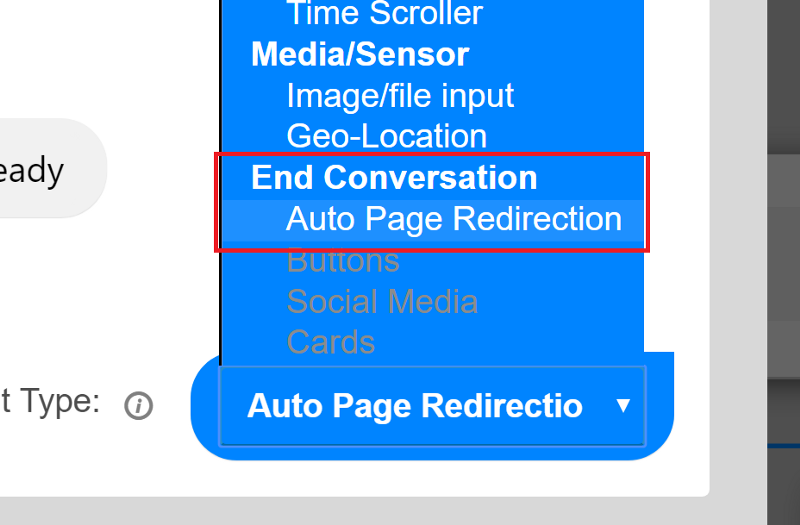
Open up the last gambit of the bot:
Make sure you have Auto-page redirection selected as the User input type:
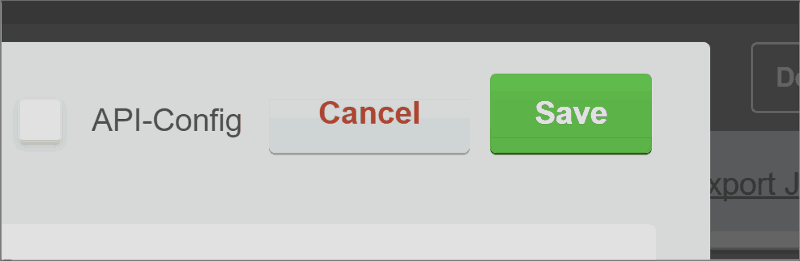
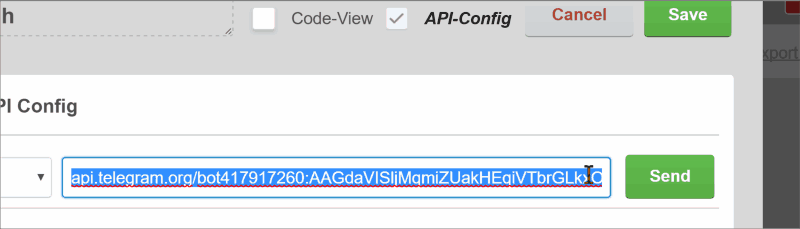
Toggle the API-Config checkbox on:
And select post from the drop down menu next to the API endpoint url:
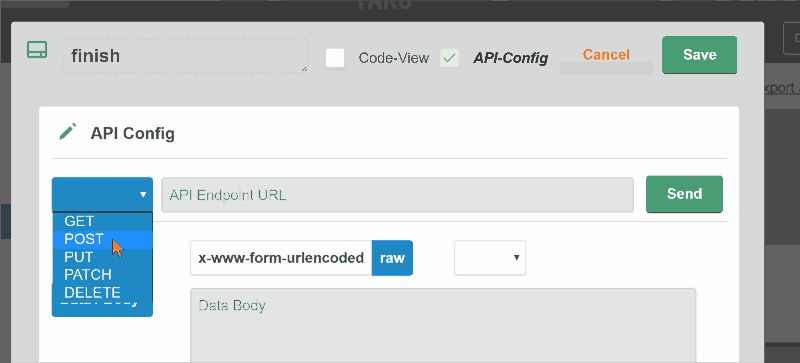
Now we are ready to make the api call
Making the API call
I won’t delve into how the telegram bot API works. If you want to know more about it check out their documentation over here.
For this explainer you just need to know one function. The sendMessage function:

To call this function use we will use the following url:
https://api.telegram.org/bot{BOT_TOKEN}/sendMessage?chat_id={YOUR_CHAT_ID}&text=
Replace {BOT_TOKEN} with the HTTP API Token we found earlier and replace {YOUR_CHAT_ID} with the chat id we found earlier
after the ‘text=’ what ever text you type, the bot will send to you.
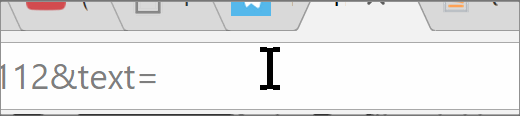
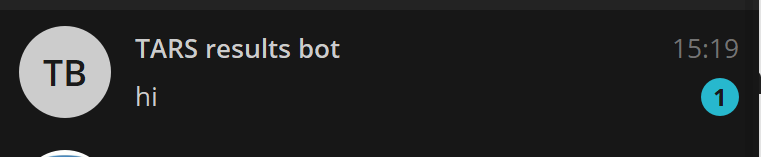
Copy and paste the url into your browser, type hi after the text=
Your bot will say hi to you
Paste the sendMessage url in the API config section of the gambit we set up earlier and save the gambit

Now, every time a user reaches the finish gambit (i.e. completes your bot) you will get a message on Telegram saying hi.
Setting up the text to be sent
Of course we don’t want the telegram bot to say hi. We want it to send us the info that the bot collected. So now we will construct the piece of text that you will put in place of hi.
In the bot I am using as an example, I want to collect information from 3 gambits in particular. The name, email and query gambits:
In case you do not know yet, if you want to call a users response from a previous gambit you use {{ursp.gambit_name}}.
Of course we would replace gambit name with the names of the gambits you want. In this case: name, email and query.

So instead of hi we will put {{ursp.name}}{{ursp.email}}{{ursp.query}}
Now if someone completes your bot you will get a message on telegram with the details:

Formatting the message
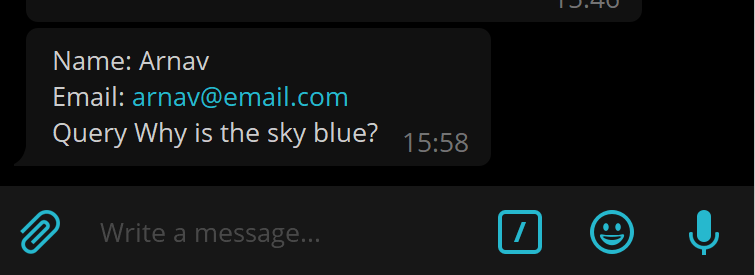
In the image above you can see that when the message is sent on telegram there are no spaces between the details. Ideally, we’d want the message to look like this:
Name: Arnav
Email: arnav@email.com
Query: Why is the sky blue?
For this we will have to adjust the piece of text send from this:
{{ursp.name}}{{ursp.email}}{{ursp.query}}
To this:
Name:%20{{ursp.name}}%0AEmail:%20{{ursp.email}}%0AQuery%20{{ursp.query}}
The %20 represents a space and the %0A represents a new line.
Now when a user uses the contact form bot, I will get a message that looks like this on Telegram:
[OPTIONAL] Making message text bold
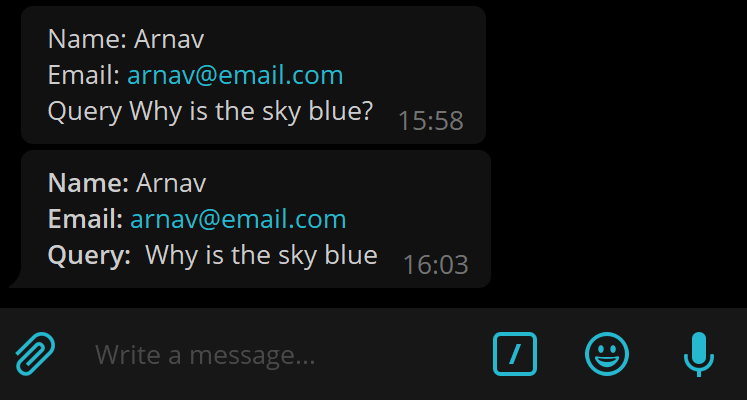
If you want to format the message further and make it look like this (i.e. make Name, email and query bold):
Name: Arnav
Email: arnav@email.com
Query: Why is the sky blue?
replace the text with
<b>Name:</b>%20{{ursp.name}}%0A<b>Email:</b>%20{{ursp.email}}%0A<b>Query: </b>%20{{ursp.query}}&parse_mode=HTML
Basically, we are putting <b> </b> (which are html bold tag) around the field names and adding &parse_mode=HTML to the end so that telegram knows to read the message text as html and thus make the tagged parts bold:
Like this experiment and my thoughts here? Click the heart below. It lets others see the story and helps me in reaching out to a lot more people 🙂

Arnav is the Director of Content Marketing at Tars. He spends most days building bots, writing about conversational design and scrolling through Giphy’s trending section looking for the gifs that go into the Tars Newsletter.
- Create a bot on Telegram
- Find out your chat id on Telegram
- Set up the TARS Bot
- Making the API call
- Setting up the text to be sent
- Formatting the message
- [OPTIONAL] Making message text bold
- Like this experiment and my thoughts here? Click the heart below. It lets others see the story and helps me in reaching out to a lot more people 🙂


Learn why businesses trust us to automate their pre-sales and post-sales customer journeys.
Recommended Reading: Check Out Our Favorite Blog Posts!
Recommended Reading: Check Out Our Favorite Blog Posts!
Easy Marketing Optimization with Chatbots – Beginner’s Guide

Using a Chatbot for Commercial Real Estate – Beginner’s Guide

AI for Internal Communications and Employee Management
Our achievements in numbers

7+
years in the Enterprise Conversational AI space

700+
global brands that we’ve worked with

50m+
customer conversations automated

10+
countries with deployed Chatbots